
Redis pub/sub, also known as Redis Publish-Subscribe, is a messaging pattern that allows multiple clients to subscribe to specific channels and receive published messages. This pattern is helpful for building real-time applications and is supported by the Redis in-memory data structure store.
What is Redis pub/sub?
Redis pub/sub is a messaging pattern that allows multiple clients to subscribe to specific channels and receive published messages. This pattern helps build real-time applications and is supported by the Redis in-memory data structure store.
Why should we use Redis pub/sub?
Redis pub/sub can be used to build real-time applications that require fast and reliable messaging. It can also be used to implement decoupled architectures, where different parts of an application can communicate without the need for direct interactions.
Realtime messaging app
Let us build a real-time messaging app using Redis Pub/Sub.
Prerequisite
- To set up the server, we must ensure we have Node and npm installed. If you still need to install Node, please follow Here.
- Since we are using Redis, we'll need a Redis server. Follow Here to have the Redis server installed on your machine.
Server
Let us code the Server-side (using Express and Redis):
Firstly, create a folder server.
mkdir serverThen go into the new directory.
$ cd serverNow, let us set up the server.
Inside the server folder, let us initialize a project. To initialize, run the below command.
npm init -yAfter running the above command, you'll now have two files created package.json and package-lock.json
It is time to install the dependencies our server code will need to run successfully. Let us add express, redis, and socket.io packages to our server.
npm install express Redis socket.ioFinally, it is time to write a code, but before that, let us create a new file, server.js
touch server.jsAfter the file is created, copy the below code snippet and place it inside the server.js file. For simplicity, I have added a comment in the codebase to make it easier for you to understand the code.
//Importing the dependencies
const express = require("express");
const app = express();
const server = require("http").Server(app);
// So that it can be accessed from any origin
const io = require("socket.io")(server, {
  cors: {
    origin: "*",
  },
});
const redis = require("redis");

const main = async () => {
  // Creating a redis client
  const redisClientPub = redis.createClient();
  await redisClientPub.connect();

  // creating a redis subscriber
  const redisClientSub = redisClientPub.duplicate();
  await redisClientSub.connect();

  app.get("/", (req, res) => {
    res.send("success");
  });

  // Creating a websocket connection.
  io.on("connection", (socket) => {
    socket.on("subscribe", async (channel) => {
      await redisClientSub.subscribe(channel, (message) => {
        io.emit("new message", { channel: channel, message: message });
      });
    });

    socket.on("unsubscribe", async (channel) => {
      await redisClientSub.unsubscribe(channel);
    });

    socket.on("send message", async (channel, message) => {
      await redisClientPub.publish(channel, message);
    });
  });

  server.listen(8000, () => {
    console.log("Server is running");
  });
};

main();
Run the server.
node server.jsCode Explanation
- It starts by importing the necessary dependencies: the Express.js web framework, the http module, the Socket.IO library for real-time messaging, and the Redis client for Node.js.
- Next, it creates an Express.js application and sets up an HTTP server using the app object.
- It also creates an instance of the Socket.IO library, passing in the server object, and sets up a CORS origin of "*" to allow connections from any origin.
- Next, it creates two Redis clients: one for publishing messages (redisClientPub) and one for subscribing to messages (redisClientSub).
- The app has a single endpoint that responds to GET requests with the text "success".
- The code sets up a "connection" event listener using the Socket.IO library. This will be triggered when a new client connects to the server.
- When a new client connects, it sets up event listeners for the "subscribe", "unsubscribe", and "send message" events.
- When a client sends a "subscribe" event, the server uses the redisClientSub to subscribe to the specified channel and listens for new messages. When a new message is received, it emits a "new message" event to all clients, along with the channel and message data.
- When a client sends an "unsubscribe" event, the server uses the redisClientSub to unsubscribe from the specified channel.
- When a client sends a "send message" event, the server uses the redisClientPub to publish the message to the specified channel.
- Finally, the server starts listening on port 8000 and logs a message to the console to indicate that the server is running.
This code creates a simple real-time messaging system where clients can subscribe and unsubscribe to different channels and send and receive messages in real time.
Client
Let us now set up the client side. We will use React and socket.io on the client side. In the root folder, run the below command.
Folder Structure
chat-app
  client
  server
npx create-react-app clientSince we'll be using socket.io, let's install it as the dependency.
npm install socket.io-clientFinally, now it is time to code. Replace the below content with the App.js file.
import React, { useState } from "react";
import socketIOClient from "socket.io-client";

const App = () => {
  const [currentChannel, setCurrentChannel] = useState(null);
  const [messages, setMessages] = useState([]);
  const [channelName, setChannelName] = useState("");
  const [message, setMessage] = useState("");

  const socket = socketIOClient("http://localhost:8000");

  const joinChannel = (event) => {
    event.preventDefault();
    setCurrentChannel(channelName);
    socket.emit("subscribe", channelName);
    setMessages([`You joined ${channelName}`]);
  };

  const leaveChannel = (event) => {
    event.preventDefault();
    if (currentChannel) {
      socket.emit("unsubscribe", currentChannel);
      setMessages([...messages, `You left ${currentChannel}`]);
      setCurrentChannel(null);
    }
  };

  const sendMessage = (event) => {
    event.preventDefault();
    if (currentChannel) {
      socket.emit("send message", currentChannel, message);
      setMessage("");
    }
  };

  socket.on("new message", (data) => {
    setMessages([...messages, `${data.channel}: ${data.message}`]);
  });

  return (
    <div>
      <form onSubmit={joinChannel}>
        <input
          type="text"
          placeholder="Channel name"
          value={channelName}
          onChange={(e) => setChannelName(e.target.value)}
        />
        <button type="submit">Join</button>
      </form>
      <form onSubmit={leaveChannel}>
        <button type="submit">Leave</button>
      </form>
      <ul>
        {messages.map((message, index) => (
          <li key={index}>{message}</li>
        ))}
      </ul>
      <form onSubmit={sendMessage}>
        <input
          type="text"
          placeholder="Message"
          value={message}
          onChange={(e) => setMessage(e.target.value)}
        />
        <button type="submit">Send</button>
      </form>
    </div>
  );
};

export default App;
Run the clinet.
npm startIn this example, the client-side code is written using React hooks, which allows you to use state and lifecycle methods in functional components. The code uses the useState hook to manage the application's state, such as the current channel, message, and input. It also uses the socketIOClient library to connect to the server and handle the socket communication. The joinChannel, leaveChannel, and sendMessage functions handle the events of joining, leaving, and sending the message to the channel.
What is Socket.io
Socket.IO is a JavaScript library for real-time web applications. It enables real-time, bi-directional communication between web clients and servers. It allows you to send and receive data in real-time without needing the client to poll the server for updates constantly.
It uses WebSockets as the underlying protocol but also falls back to other methods (such as long polling) if the client's browser does not support WebSockets. This allows Socket.IO to work on a wide range of browsers and devices.
It provides an easy-to-use API for real-time communication between clients and servers, including methods for connecting, disconnecting, and sending and receiving data. It also has built-in support for handling events and rooms, which can be used to organize communication between clients.
Socket.IO is commonly used for real-time chat applications, multiplayer games, and other real-time web applications. It can be used with various web development frameworks, including Express.js, Node.js, and React.
Pros and Cons of using Redis pub/sub
Pros
- Fast and reliable messaging
- Decoupled architecture
- Easy to implement
Cons:
- Limited scalability
- Limited message persistence
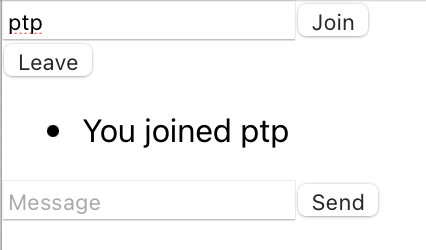
Snapshots
Joining a channel
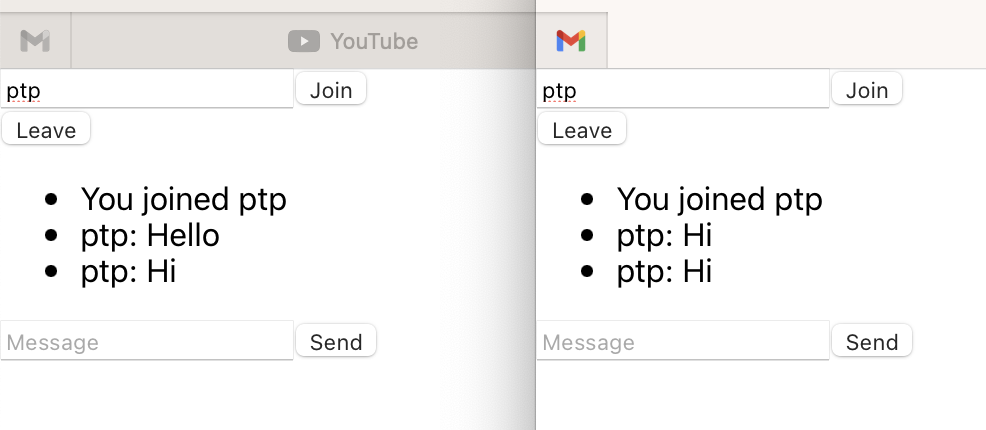
Chat Application
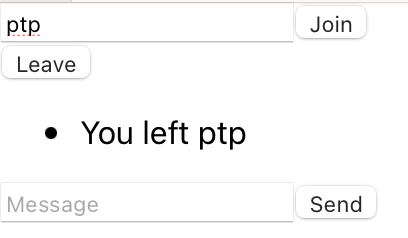
Leaving a channel
You can find the full access to the code here Here
Conclusion
Redis pub/sub is a useful pattern for building real-time applications and implementing decoupled architectures. It is easy to implement and fast, but has some limitations in terms of scalability and message persistence. Overall, it is a great choice for certain types of applications but may not be the best fit for others.
You may also like my other articles:
- Strapi.js - Open Source Node.js Headless CMS
- Things to keep in mind before starting Javascript framework
- ES2020/ES10: The Next Big Update! Awesome New JavaScript Features With Examples
💌 If you'd like to receive more tutorials in your inbox, you can sign up for the newsletter here.
Please let me know if there's anything else I can add or if there's any way to improve the post. Also, leave a comment if you have any feedback or suggestions.
Discussions