
Building self-hosted, customizable and performant Content API has never been easier.
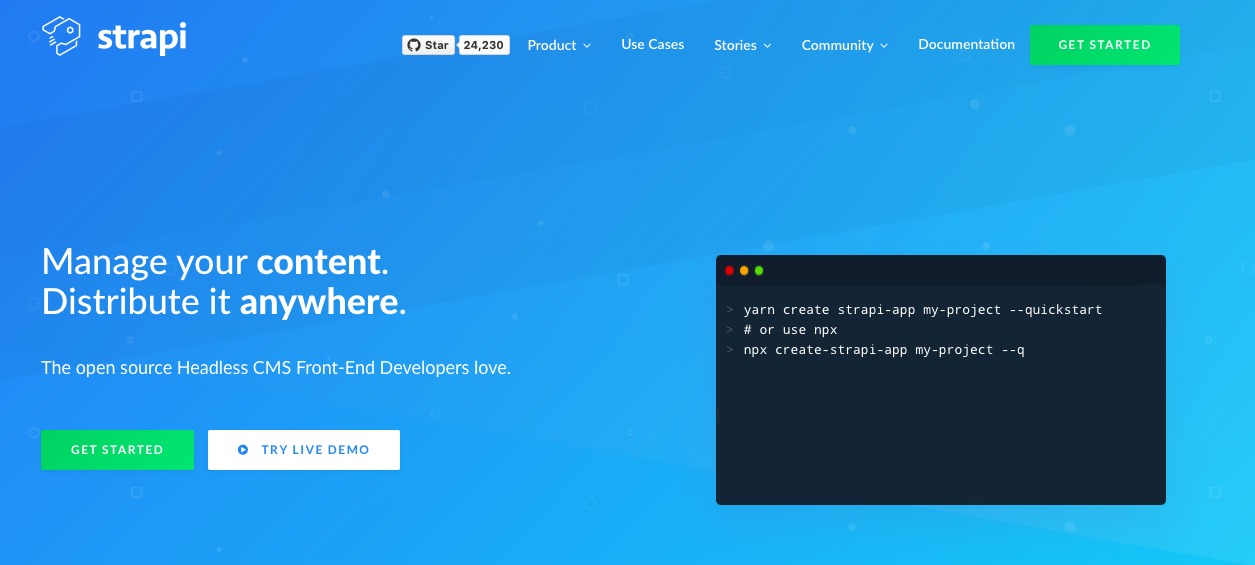
What is Strapi.js?
Strapi.js is an open-source Node.js Headless Content Management System(CMS). Strapi makes it incredibly easy to create REST Apis with JWT authentications. You can generate relationships between your content types, and you get admin area similar to what you'd have on WordPress. In strapi you are not bound to any specific front-end you can use any whatever front-end you want. If you're going to build with React.js, Vue or any front-end framework because all it does is serves JSON data.
Let's have a look at Strapi.js. We will be creating a REST API with products and categories and also implement users and authentication. And have a glance in the admin area. Here we'll also go through the code and see how we can override and customize.
To handle data, you can use any database like MongoDB, PostgreSQL, MySQL, etc. But the strapi quick start guide is using SQLite so I'll also be using SQLite so that I don't have to set up a database separately. One can quickly implement MongoDB or any other databases. I'll guide you where you can add credentials of your database if you decide to use any of other databases.
Creating a new project
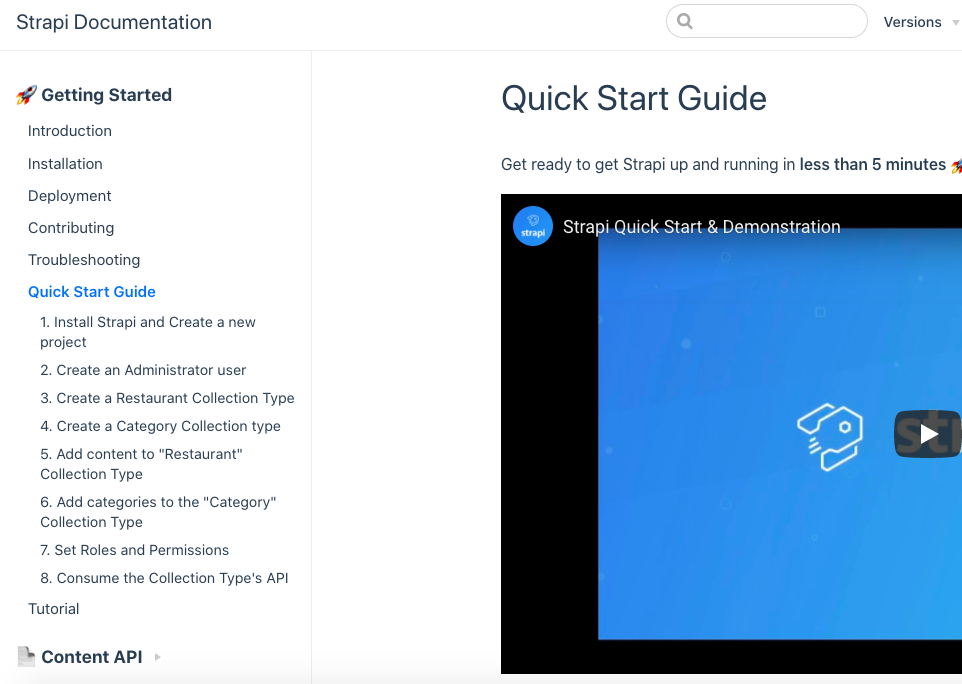
In order to create a new project, we can either use yarn or npx. If you use yarn you'll have to install strapi globally, or if you use npx then you can install directly. It is the same as how we used to create a new React project.
Firstly, open VS Code and then open terminal, create an empty folder and run below code.
Using yarn -> strapi-app must be installed globally
yarn create strapi-app my-project --quickstart
Using npx
npx create-strapi-app my-project --quickstart
After running the above command, wait for the installation to complete. Once the installation is completed a new window will appear where it will ask you to create an admin user for our admin area.
It opens a window at http://localhost:1337/admin/auth/register by default.
Setting up project
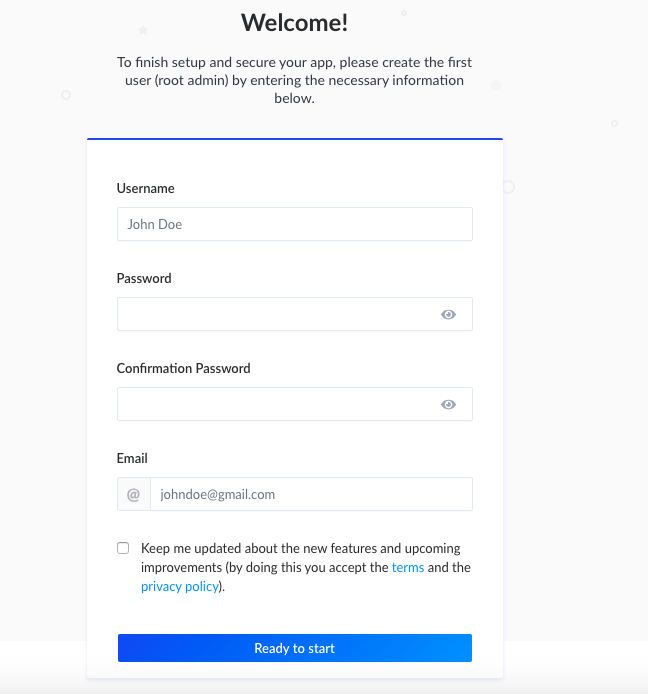
Fill the empty fields as your preference
username: pratap
password: testpassword
confirm password: testpassword
email: iam@pratapsharma.io
And then click on ready to start.
After starting, it should take you to the admin area.
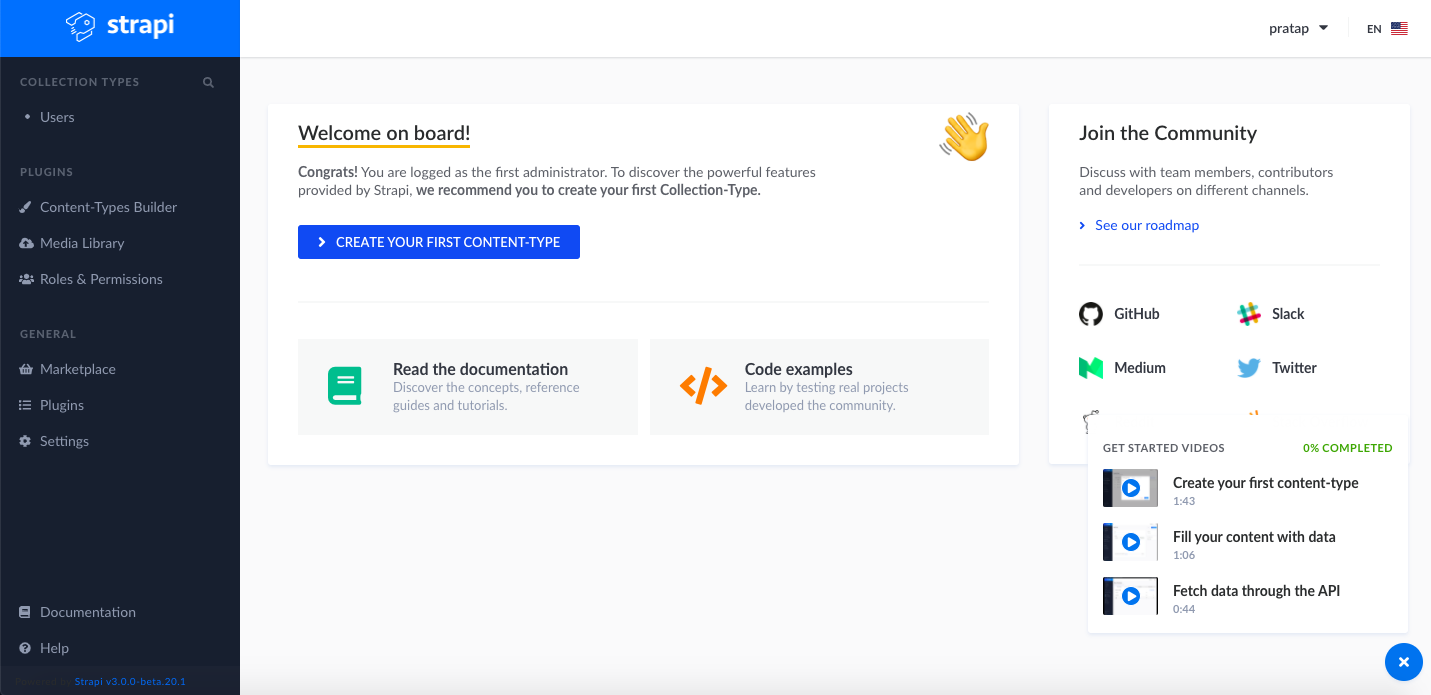
In Strapi, there is also a concept of Plugins which we commonly find in WordPress.
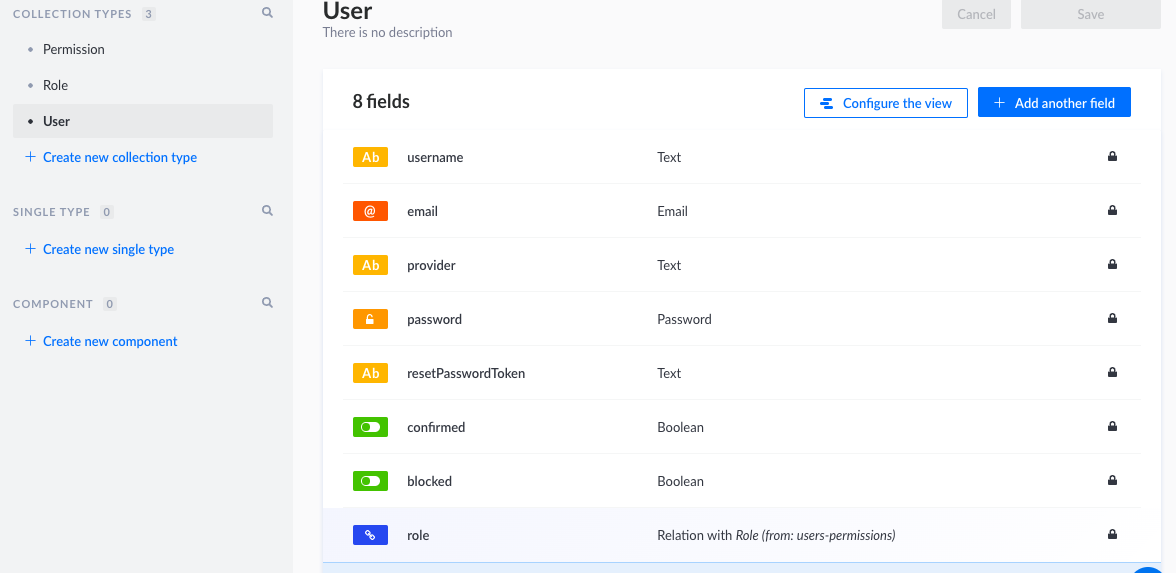
In the sidebar click on Users. This collection type was automatically created by strapi quick-start guide. Now we have the functionality to create a user.
For now, let us create a new content type. To create a new content type, click on content type builder. Here you'll see users as one of the collection types. If you click on users, you'll find different fields of the user with their data types.
Creating a collection type
Let us create a new collection type named "product".
Make sure to keep it singular because Strapi will use the plural version while generating the endpoints.
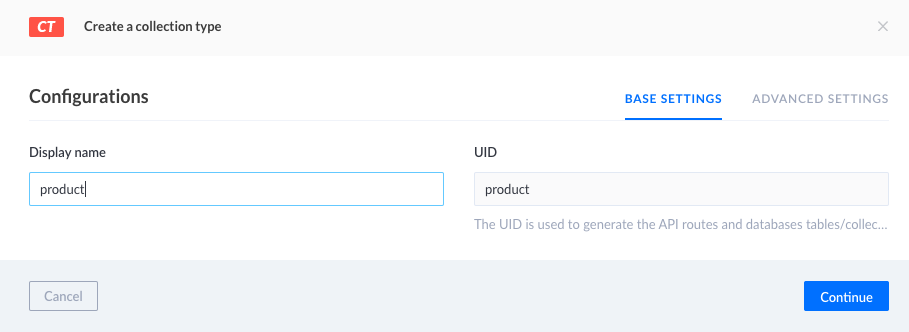
Click on continue and select the fields you want. Let us choose a text filed and give it the name of the "title". Mainly there are two types of settings to create a field- Basic Setting and Advanced setting. Click on advanced settings and check the required field and unique field.

To add another field, click on add another field, and follow the above same process.
I have created the following fields with the data types:
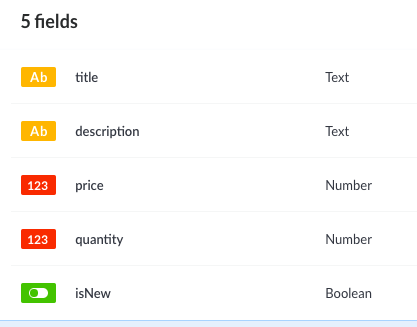
Once you are done with the addition of fields, you required, click on save.
Now you can see Product under the collection types tab.
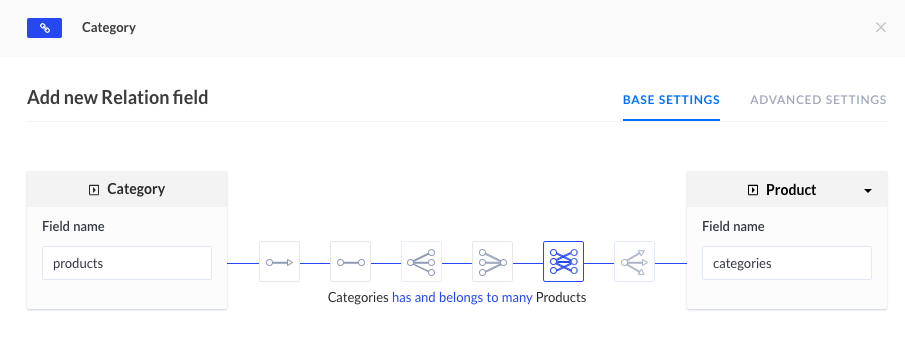
Lets quickly create another collection type called "category" and add two fields in it.
- name: text, unique, required.
- products: relationships, many to many, product
Now you should be able to see Products and Categories under collection types in the sidebar which Strapi automatically turn the singular to plural (Product -> Products and Category to Categories).
Now finally we can add data into our collection type. Select Categories and click add new category button in right-top.
I have created three categories, namely "Laptops", "Mobile Phone" and "Tablets".

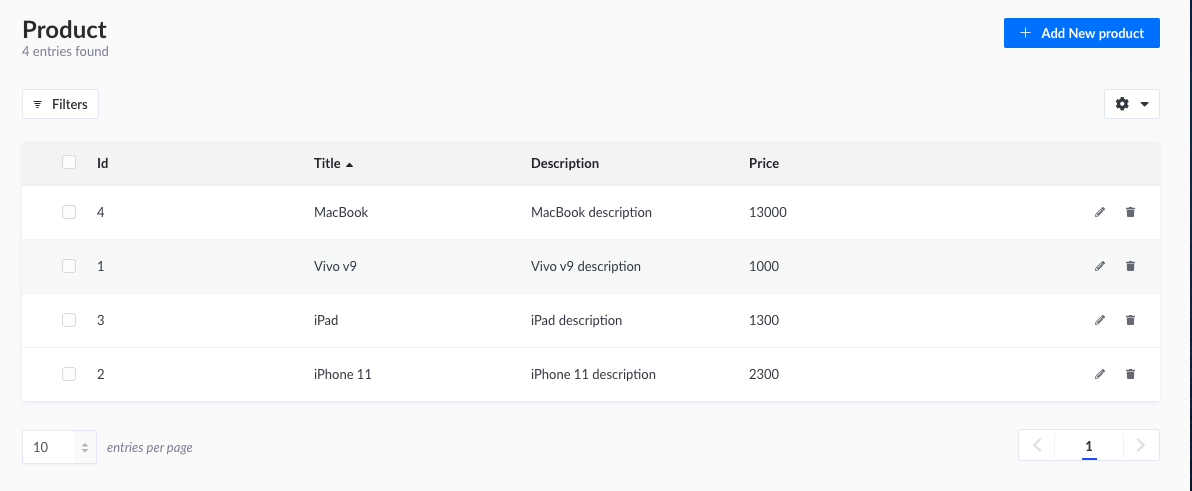
Let us follow the same and add a few products.
// Sample
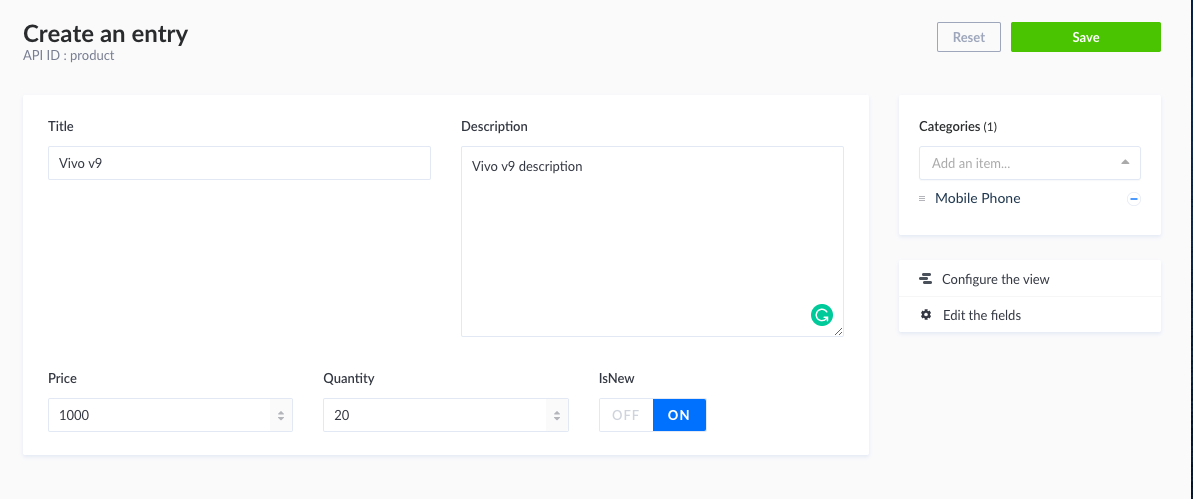
Title: Vivo v9.
Description: Vivo v9 description,
price: 1000,
quantity: 20
isNew: true,
category: Mobile PhoneI have created the following products assign categories to each of them.
Making a GET request
So now we have all the data in our database. Let us test if we can get the data which we added using the REST API. To test the endpoint open Postman. (Describe postman here)
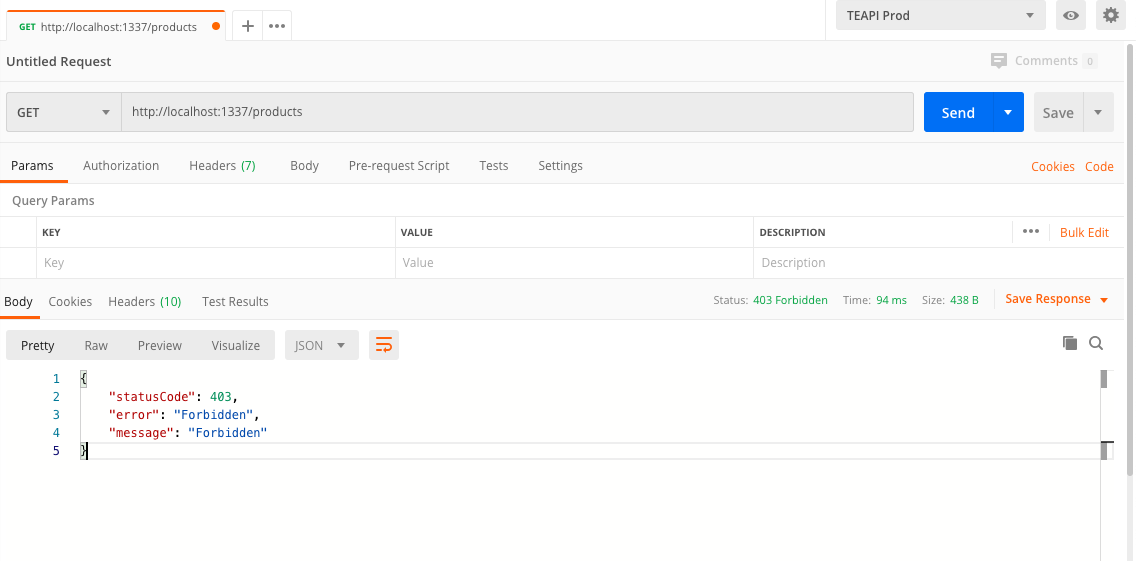
Let us make a get request to http://localhost:1337/products
 Request:
- Method: GET
- Endpoint: http://localhost:1337/products
Response
{
  "statusCode": 403,
  "error": "Forbidden",
  "message": "Forbidden"
}
By default, it will give us a status of 403 forbidden which means we don't have access to the resource. At first, everything you create will be forbidden, so we'll have to mess with the permissions.
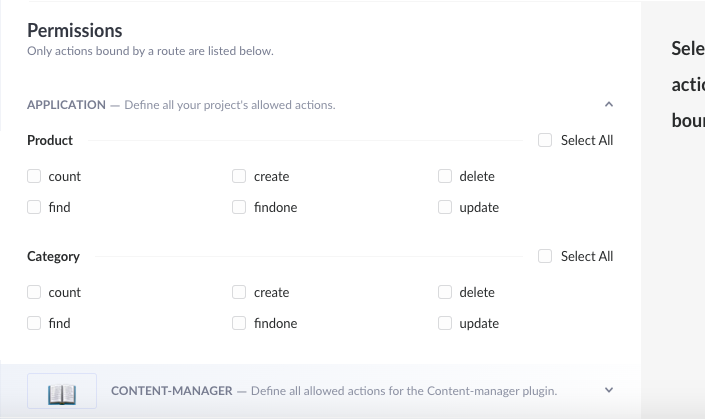
To mess with the permissions go back to Admin page under Plugin section in the sidebar click on Roles & Permissions. There you can see two default roles authenticated. You can create a new role if you wish to. For now, let us update the public role. Under permissions, you can see the properties select the property which you want it to be public. For now, I'll choose count find, findOne for both product and category.
Click on save and make a get request again from the postman. Request:
- Method: GET
- Endpoint: http://localhost:1337/products
Response
[
  {
    "id": 1,
    "title": "Vivo v9",
    "description": "Vivo v9 description",
    "price": 1000,
    "quantity": 20,
    "isNew": true,
    "created_at": "2020-05-02T20:26:17.788Z",
    "updated_at": "2020-05-02T20:26:17.788Z",
    "categories": [
      {
        "id": 1,
        "name": "Mobile Phone",
        "created_at": "2020-05-02T20:20:37.221Z",
        "updated_at": "2020-05-02T20:20:37.221Z"
      }
    ]
  },
  {
    "id": 2,
    "title": "iPhone 11",
    "description": "iPhone 11 description",
    "price": 2300,
    "quantity": 13,
    "isNew": true,
    "created_at": "2020-05-02T20:26:46.504Z",
    "updated_at": "2020-05-02T20:26:46.504Z",
    "categories": [
      {
        "id": 1,
        "name": "Mobile Phone",
        "created_at": "2020-05-02T20:20:37.221Z",
        "updated_at": "2020-05-02T20:20:37.221Z"
      }
    ]
  },
  {
    "id": 3,
    "title": "iPad",
    "description": "iPad description",
    "price": 1300,
    "quantity": 10,
    "isNew": true,
    "created_at": "2020-05-02T20:27:35.070Z",
    "updated_at": "2020-05-02T20:27:35.070Z",
    "categories": [
      {
        "id": 2,
        "name": "Tablets",
        "created_at": "2020-05-02T20:20:44.731Z",
        "updated_at": "2020-05-02T20:20:44.731Z"
      }
    ]
  },
  {
    "id": 4,
    "title": "MacBook",
    "description": "MacBook description",
    "price": 13000,
    "quantity": 12,
    "isNew": true,
    "created_at": "2020-05-02T20:28:03.126Z",
    "updated_at": "2020-05-02T20:28:03.126Z",
    "categories": [
      {
        "id": 3,
        "name": "Laptops",
        "created_at": "2020-05-02T20:20:51.338Z",
        "updated_at": "2020-05-02T20:20:51.338Z"
      }
    ]
  }
]
Now you can see we are able to fetch a list of products. We have an id, created_at, updated_at which are created automatically and also other fields which we created. We also get categories filed, and they are multiple as we can have multiple categories for a product.
To get a single product make a get request http://localhost:1337/products/1 in postman and you'll get a response data for the product with id: 1. Request:
- Method: GET
- Endpoint: http://localhost:1337/products/1
Response
{
  "id": 1,
  "title": "Vivo v9",
  "description": "Vivo v9 description",
  "price": 1000,
  "quantity": 20,
  "isNew": true,
  "created_at": "2020-05-02T20:26:17.788Z",
  "updated_at": "2020-05-02T20:26:17.788Z",
  "categories": [
    {
      "id": 1,
      "name": "Mobile Phone",
      "created_at": "2020-05-02T20:20:37.221Z",
      "updated_at": "2020-05-02T20:20:37.221Z"
    }
  ]
}
We can also make a get request using query params. Make a get request with the given query params http://localhost:1337/products?_limit=2&_sort=title in postman. You can see that we only get two results and are sorted by their title. Please check the documentation for other query parameters. Request:
- Method: GET
- Endpoint: http://localhost:1337/products?_limit=2&_sort=title
Response
[
  {
    "id": 4,
    "title": "MacBook",
    "description": "MacBook description",
    "price": 13000,
    "quantity": 12,
    "isNew": true,
    "created_at": "2020-05-02T20:28:03.126Z",
    "updated_at": "2020-05-02T20:28:03.126Z",
    "categories": [
      {
        "id": 3,
        "name": "Laptops",
        "created_at": "2020-05-02T20:20:51.338Z",
        "updated_at": "2020-05-02T20:20:51.338Z"
      }
    ]
  },
  {
    "id": 1,
    "title": "Vivo v9",
    "description": "Vivo v9 description",
    "price": 1000,
    "quantity": 20,
    "isNew": true,
    "created_at": "2020-05-02T20:26:17.788Z",
    "updated_at": "2020-05-02T20:26:17.788Z",
    "categories": [
      {
        "id": 1,
        "name": "Mobile Phone",
        "created_at": "2020-05-02T20:20:37.221Z",
        "updated_at": "2020-05-02T20:20:37.221Z"
      }
    ]
  }
]
Making a POST request
Firstly, let us try to add a new product. Since Strapi is a RESTful API, we can make all types of an HTTP request. Let us make a POST request in order to create a new product.
Request:
- Method: POST
- Endpoint: http://localhost:1337/products
- Body:
{
  "title": "Test Product",
  "description": "This is a test product",
  "price": 99.99,
  "quantity": 10,
  "isNew": true
}
Response
{
  "statusCode": 403,
  "error": "Forbidden",
  "message": "Forbidden"
}
What just happened?? Why did we get the Forbidden message?
If you remember when we give permissions above we gave permissions to get count, find and find one. So we are not permitted to make any changes to the database. This is the best thing I like about Strapi.
Let us go back to our admin area and give permission to make a post request. In order to make a post request, we'll need a user. Firstly let us create a user.
Click on users under COLLECTION TYPES tab and click on Add New User in the top right of the page.
Fill the empty fields as per your preference.
username: sam
email: sam@gmail.com
password: test
confirmed: true
role: Authenticated. -> You'll find this as a dropdown.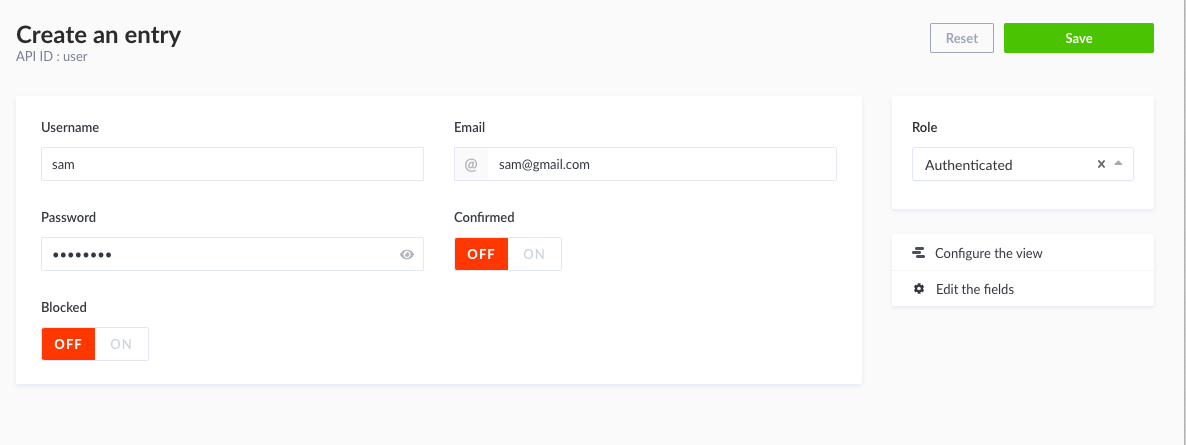
Click on save.
Now go to Roles and Permissions under PLUGINS tab and select Authenticated role.
Under permission check select all for both product and category and then save.

We are not yet done. As the Request still doesn't know who is making a request. Since we are using JSON Web Token(JWT) we'll have to give an authorization with the Request.
In order to generate the authorization, we now have to make a new POST request with the following params. First I'll try to authenticate with the wrong password. After making a request with the wrong password, I get a message Identifier or password invalid. This message can be used in front-end in order to display an error message or alert. You can also edit the code if you want to customize the error message etc.
Request:
- Method: POST
- Endpoint: http://localhost:1337/auth/local
- Body:
{
  "identifier": "sam",
  "password": "wrongPassword"
}
Response
{
  "statusCode": 400,
  "error": "Bad Request",
  "message": [
    {
      "messages": [
        {
          "id": "Auth.form.error.invalid",
          "message": "Identifier or password invalid."
        }
      ]
    }
  ],
  "data": [
    {
      "messages": [
        {
          "id": "Auth.form.error.invalid",
          "message": "Identifier or password invalid."
        }
      ]
    }
  ]
}
Now requesting again with the correct password I get the below response:
Request:
- Method: POST
- Endpoint: http://localhost:1337/auth/local
- Body:
{
  "identifier": "sam",
  "password": "correctPassowrd"
}
Response
{
  "jwt": "eyJhbGciOiJIUzI1NiIsInR5cCI6IkpXVCJ9.eyJpZCI6MSwiaWF0IjoxNTg4NDg3NTIxLCJleHAiOjE1OTEwNzk1MjF9.46G4XlopbCRtNTGDCcgEnDVmn97uZZyxyg7BIwMKENo",
  "user": {
    "id": 1,
    "username": "sam",
    "email": "sam@gmail.com",
    "provider": "local",
    "confirmed": true,
    "blocked": false,
    "role": {
      "id": 1,
      "name": "Authenticated",
      "description": "Default role given to authenticated user.",
      "type": "authenticated"
    },
    "created_at": "2020-05-03T06:22:26.647Z",
    "updated_at": "2020-05-03T06:22:26.657Z"
  }
}
Now copy the JWT token which you received with the above Request and use it to make a request again. In the postman, click on the Authorization Tab and select Bearer Token and paster the token in the field.
Request:
- Method: POST
- Endpoint: http://localhost:1337/products
- Authorization: Bearer {Your JWT token here}
- Body:
{
  "title": "Test Product",
  "description": "This is a test product",
  "price": 99.99,
  "quantity": 10,
  "isNew": true
}
Response
{
  "id": 5,
  "title": "Test Product",
  "description": "This is a test product",
  "price": 99.99,
  "quantity": 10,
  "isNew": true,
  "created_at": "2020-05-03T06:37:35.139Z",
  "updated_at": "2020-05-03T06:37:35.139Z",
  "categories": []
}
Wooah!, We'have just successfully added a new product. In order to test it you can make a GET request to products and see the new product in the response. You can also check in the admin area that a new product was added.
Good going buddy now you are able to make a GET request, POST request which is a basic of REST Apis.
Dive into the code
We have basically created an API with authentication, sorting etc. without writing a single line of code.
Firstly lets checkout package.json file.
{
  "name": "my-project",
  "private": true,
  "version": "0.1.0",
  "description": "A Strapi application",
  "scripts": {
    "develop": "strapi develop",
    "start": "strapi start",
    "build": "strapi build",
    "strapi": "strapi"
  },
  "devDependencies": {},
  "dependencies": {
    "strapi": "3.0.0-beta.20.1",
    "strapi-admin": "3.0.0-beta.20.1",
    "strapi-utils": "3.0.0-beta.20.1",
    "strapi-plugin-content-type-builder": "3.0.0-beta.20.1",
    "strapi-plugin-content-manager": "3.0.0-beta.20.1",
    "strapi-plugin-users-permissions": "3.0.0-beta.20.1",
    "strapi-plugin-email": "3.0.0-beta.20.1",
    "strapi-plugin-upload": "3.0.0-beta.20.1",
    "strapi-connector-bookshelf": "3.0.0-beta.20.1",
    "knex": "<0.20.0",
    "sqlite3": "latest"
  },
  "author": {
    "name": "A Strapi developer"
  },
  "strapi": {
    "uuid": "04c8d6a3-cff5-42d7-8f0a-facfdde0eff5"
  },
  "engines": {
    "node": ">=10.0.0",
    "npm": ">=6.0.0"
  },
  "license": "MIT"
}
As we can see in the dependecies we have Strapi along with bunch of plugins and utilities.
If you want to start the server you can command(Follow the scripts mentioned in package.json):
yarn develop
Also, if you want to make a build of it, you can run:
yarn build
The folder structure which Strapi follows is as below:
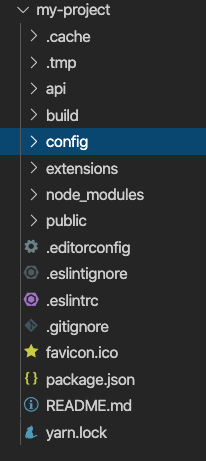
As far as the database is concern go to the config folder and then into the environment folder.
In the environment folder, you can see three different environments, namely development, staging and production.
You can set different variables for different environments.
So if you open database.json file in development folder, you can see that I am using SQLite
"client": "sqlite",If you check the same file in the production folder, then you can see we can set our own variables.
"client": "sqlite",
 "host": "${process.env.DATABASE_HOST || '127.0.0.1'}",
 "port": "${process.env.DATABASE_PORT || 27017}",
 "database": "${process.env.DATABASE_NAME || 'strapi'}",
 "username": "${process.env.DATABASE_USERNAME || ''}",
 "password": "${process.env.DATABASE_PASSWORD || ''}"
This is where we can use database of our own. You can check the documentation guide on how to use different databse.
API folder.
The most import folder in this project is the api folder because this is everything we just did from the admin page.
You can see we have category and product which we created from the admin page.
Inside api -> config folder you can see routes.json
{
 "routes": [
 {
 "method": "GET",
 "path": "/categories",
 "handler": "category.find",
 "config": {
 "policies": []
 }
 },
 {
 "method": "GET",
 "path": "/categories/count",
 "handler": "category.count",
 "config": {
 "policies": []
 }
 },
]
This is where all our GET, POST, DELETE rotes are stored.
As you see from above the handler category.find goes to controller and then it goes to service and grab the data from database and return the result.
Under the models folder, you can find the schema for our category type.
Closing Note
This is a basic overview of Strapi, and obviously, there's more to it for that you may want to check the official documentation.
I'll definitely be using Strapi in my upcoming projects as I'm repeating myself to create a REST API using Node.js and Express so this will make things a lot easier.
💌 If you’d like to receive more tutorials in your inbox, you can sign up for the newsletter here.
Discussions