Let's learn to Use App Center, which part of the Visual Studio product suite from Microsoft to Automatically Build and Distribute Your React Native App.
In this blog post, we will learn how to integrate AppCenter SDK into a React native app. I have been using AppCenter in my work for a long time, and I can testify that it's a real time saver when it comes to building, integrating and distributing your app for testers or to the app stores.
What is App center?
Microsoft Visual Studio App Center is an integrated mobile development lifecycle solution for iOS, Android and Windows apps. It brings together multiple services commonly used by mobile developers, including build, test, distribute, monitoring, diagnostics into one single integrated cloud solution.
The SDK uses a modular architecture so you can use any or all of the services.
Now, let's get started with setting up App Center React Native SDK in your React-Native app in order to use App Center Analytics and App Center Crashes.
Prerequisites
In order to use App Center you have to make sure that the following prerequisites are met:
- React Native 0.34 or later.
- Target devices of Android Version 4.1/API level 16 or later, or iOS version 9.0 or later.
Create app in the App Center Portal to obtain the App Secret
- Head over to appcenter.ms.
- Sign up or log in and click on Add new and select Add new app from the dropdown menu.
- Enter a name and description for your app.
- Now, select the appropriate OS (Android or iOS) and select React Native as the platform.
- Click on Add new app.
You've successfully created an app; promptly you can obtain its App Secret from the Settings page on the App Center Portal. You can find it at the top right-hand corner of the Settings page, click on the triple vertical dots and select Copy app secret to get your App Secret.
Add the App Center SDK modules
Open a terminal and then navigate to the root of your React Native project, and run the following code:
npm install appcenter appcenter-analytics appcenter-crashes --save-exact
In case you prefer yarn over npm, use the following command to install App Center:
yarn add appcenter appcenter-analytics appcenter-crashes --exact
The SDK uses a modular approach, where you just add the modules for App Center services that you want to use. Adding the modules appcenter-analytics and appcenter-crashes make sense to add to almost every app, as they provide value with no additional setup required. appcenter provides general-purpose App Center APIs, useful for multiple services.
Integrate the App center SDK automatically for React Native > 0.60
From React-Native 0.60.0 linking packages using react-native link has become obsolete. Autolink feature has been added to the React-Native CLI, which means that iOS will now use cocoapods and Android will use Gradle.
Integrate React Native iOS
-
Run
pod install --repo-updatefrom iOS directory to install CocoaPods dependencies. -
Create a new file with the name
AppCenter-Config.plistwith the following content and replace{APP_CENTER_SECRET_VALUE}with your app secret value. Also add this file to the Xcode project (right-click the app in Xcode and click Add files to ...).
<?xml version="1.0" encoding="UTF-8"?>
<!DOCTYPE plist PUBLIC "-//Apple//DTD PLIST 1.0//EN" "https://www.apple.com/DTDs/PropertyList-1.0.dtd">
<plist version="1.0">
 <dict>
 <key>AppSecret</key>
 <string>{APP_CENTER_SECRET_VALUE}</string>
 </dict>
</plist>
- Now you need to modify the app's AppDelegate.m file to include code in order to start the SDK:
- Add these lines to import section
#import <AppCenterReactNative.h>
#import <AppCenterReactNativeAnalytics.h>
#import <AppCenterReactNativeCrashes.h>
- Add these lines to the
didFinishLaunchingWithOptionsmethod
[AppCenterReactNative register];
[AppCenterReactNativeAnalytics registerWithInitiallyEnabled:true];
[AppCenterReactNativeCrashes registerWithAutomaticProcessing];
Integrate React Native Android
- Firstly, create a new file with the name appcenter-config.json in
android/app/src/main/assets/with the following content and replace{APP_CENTER_SECRET_VALUE}with your app secret value.
{
  "app_secret": "{APP_CENTER_SECRET_VALUE}"
}
Note: A folder should be created under "project_root/android/app/src/main/assets" if the folder names assets does not exist.
- Secondly, modify the app's res/values/strings.xml to include the following lines:
<string name="appCenterCrashes_whenToSendCrashes" moduleConfig="true" translatable="false">DO_NOT_ASK_JAVASCRIPT</string>
<string name="appCenterAnalytics_whenToEnableAnalytics" moduleConfig="true" translatable="false">ALWAYS_SEND</string>
Building the React native app in App Center
1. Add App in App Center
With app center, we can now automate our React Native builds for both ios and Android. Even can distribute the app to the app store and play store after the build.
Firstly We are going to manually build the app inside the AppCenter dashboard, and then we make the build automated.
If you haven't created an account yet Create an account here.
After creating an account, your dashboard will look like this.
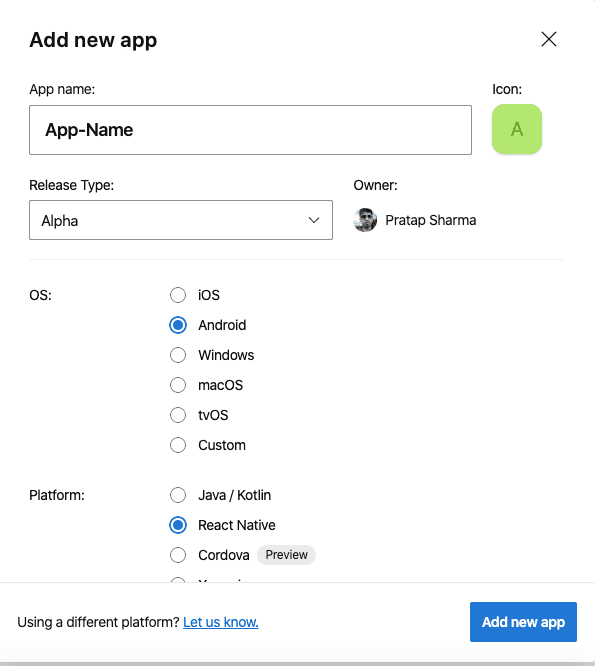
Click on Add New button which is on the right corner of the page. Fill the data according to your preference.
App Name: Name of your preference Release Type: Select alpha from dropdown OS: Android Platform: React Native
2. Connect repo to your app
To connect a repo to the app, follow these steps.
- Select the app where you want to connect the repo.
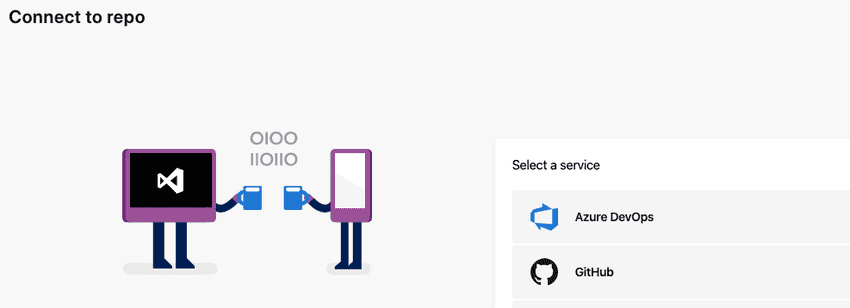
- Click on Build from the side menu. The screen should look like this.
- Now select the Version Control from where you want to clone your code.
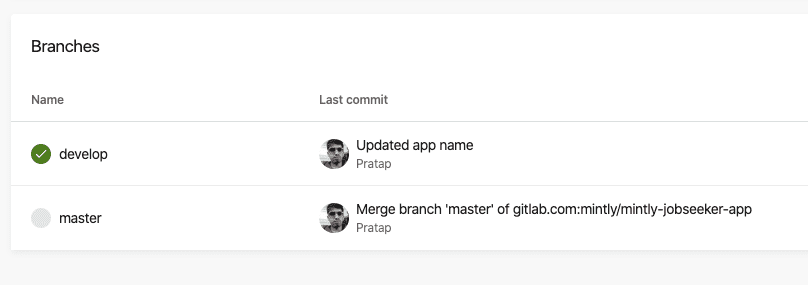
- After successfully cloning the repo you'll get a screen similar to this. Since I have multiple branches in the repo, It will show those branches.
-
Before configuring the branch, we'll have to get Keystore file. Follow this tutorial to create a Keystore file. Generate signed or released apk file from react-native. After you created the Keystore, continue to step 6.
-
There is a minor change you need to make in
android/app/build.gradlefile. Do not forget to commit the changes to your repo.
    ...
        android {
            ...
            defaultConfig { ... }
            ...
            buildTypes {
                release {
                    // Caution! In production, you need to generate your own keystore file.
                    // see https://facebook.github.io/react-native/docs/signed-apk-android.
                    //signingConfig signingConfigs.release (Comment this line. Uncomment only if you are releasing to playstore.)
                    minifyEnabled enableProguardInReleaseBuilds
                    proguardFiles getDefaultProguardFile("proguard-android.txt"), "proguard-rules.pro"
                }
            }
        }
...
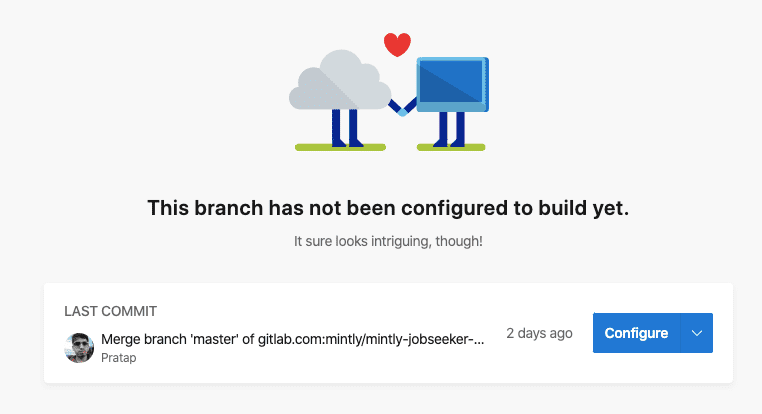
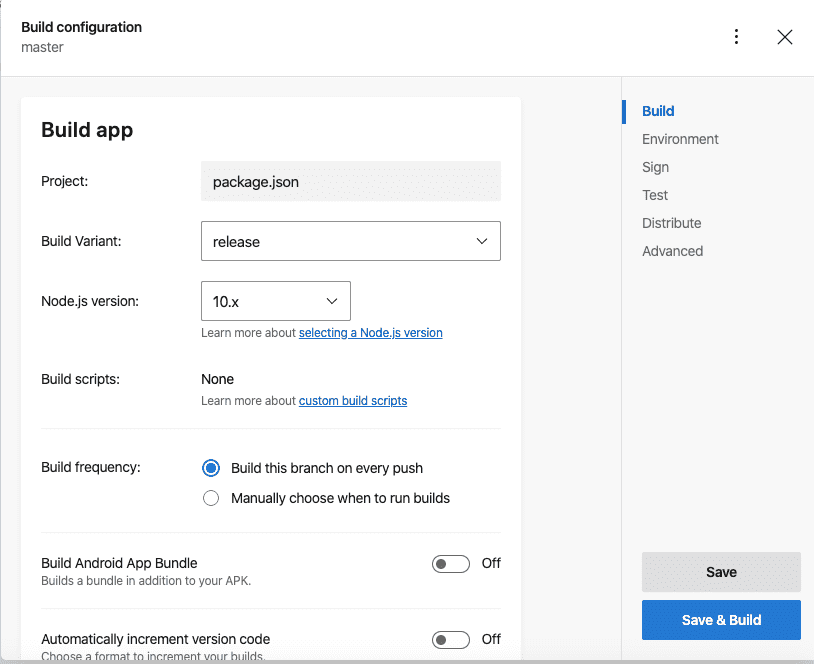
- After completing generation of Keystore file now Click on Configure
- Follow as below:
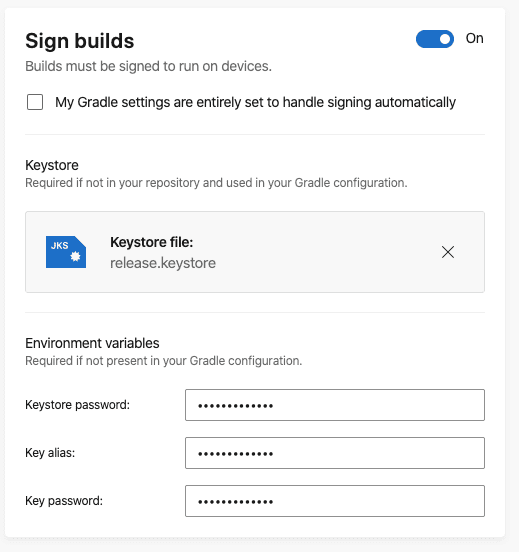
Build Variant: release Nodejs Version: 10.x or version that your react-native project support. Build frequency: Build this branch on every push (This makes sure the app is auto built on every push) Sign builds: Turn on the build and upload the Keystore file which you created and enter the environment variables.
- Now finally Click on Save & build
Finally, the build should start and successfully completed. Upon completion of build you'll see something like this.
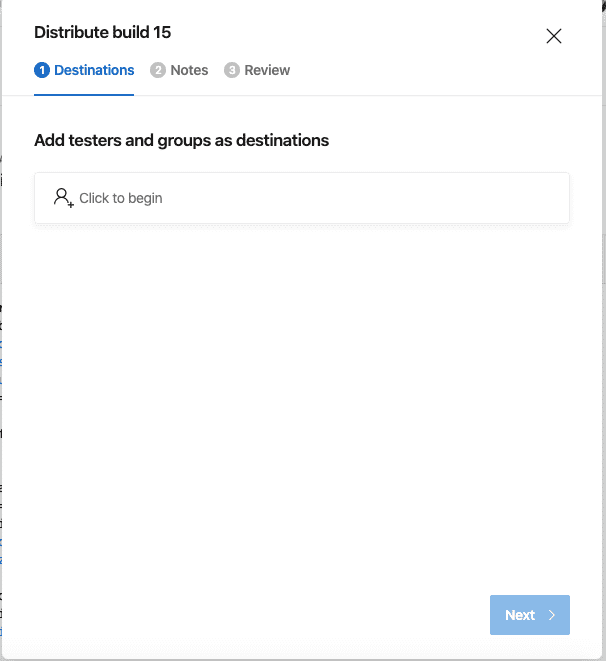
In order to distribute the app in order to test. Click on Distribute button and add the email ids of whom you wanted to share.
Conclusion
My final thoughts about AppCenter is that is the best cloud service for React native app I use it every day, and I would recommend it to anyone who works with React Native, and the most features I like about it is distributing the app to testers, (CI/CD)Continues Integration and Analytics.
💌 If you’d like to receive more tutorials in your inbox, you can sign up for the newsletter here.


Discussions